fiber arts : crochet : fallen leaves blanket
I had never done a traditional granny square (always other squares). I saw someone use this sort of pattern for edging around their granny square blanket, then found some instructions for it online as a relaxing "mindless crochet". It is a very quick and easy pattern and is really all about the colors you pick, and when you change them.
The fast and repetitive nature of this pattern triggered a flare up of tendinitis. I have had to make sure to take regular breaks and not overdo it too much (early on I was sitting for hours working on this blanket).
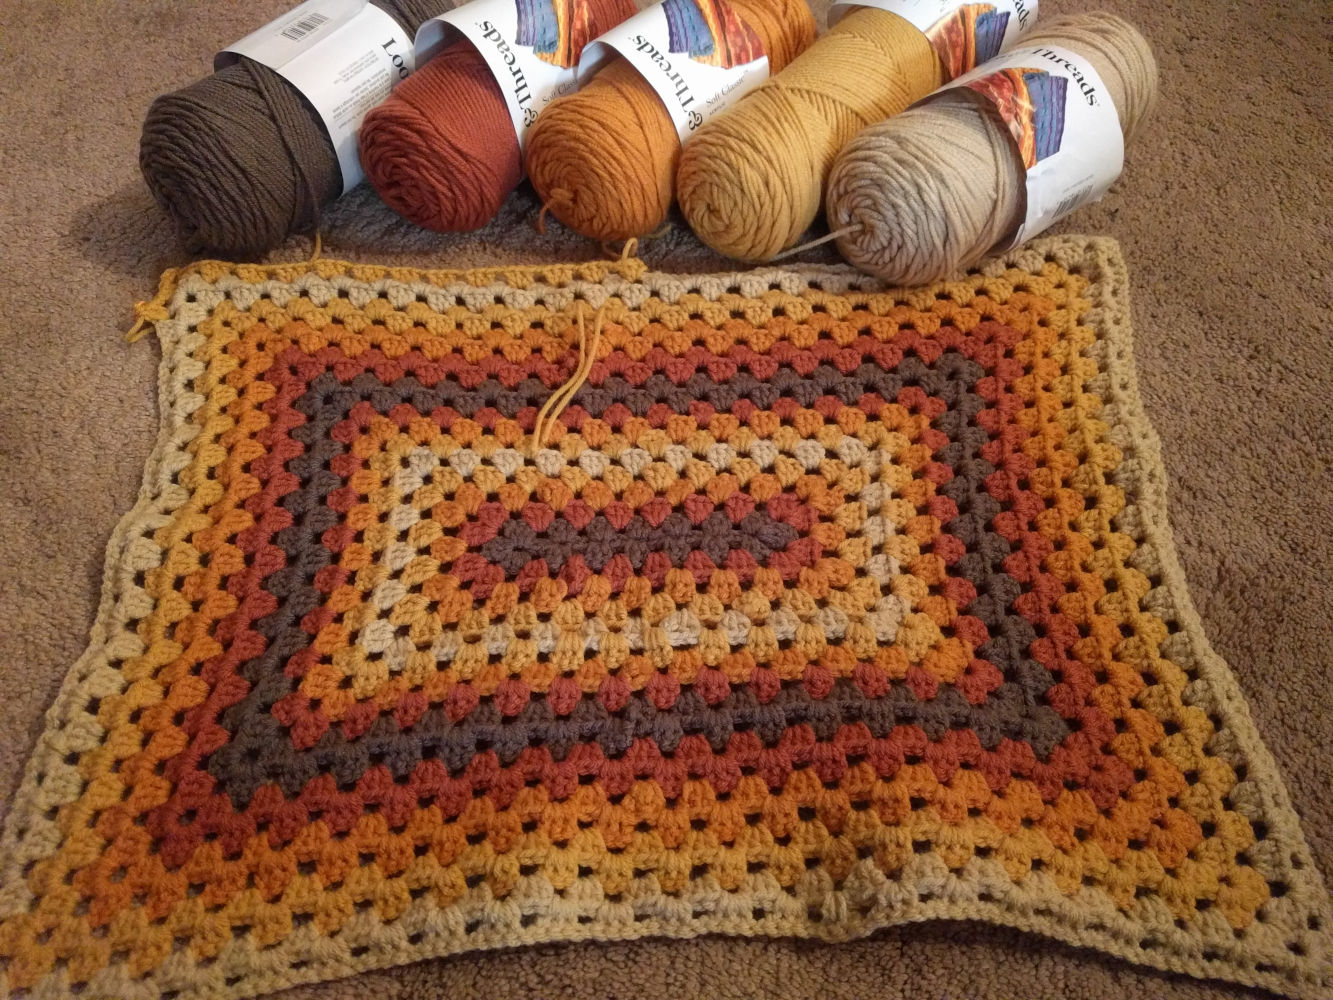
I really love the colors I landed on for this project. I spent a lot of time at the store picking and putting back various yarns. I then found these yarns and it all just came together in my mind. This is the most color changing I've done in a project, and it is interesting. Much less intimidating than I used to think it would be. The colors go from dark to light to dark again. After each repetition the color bands get one row thicker. I think it is a good look.
Images
Information
- Hook Size
- 5mm
- Yarn Weight
- 4 / Worsted
- Yarn Type
- Acrylic
- Yarn I used
- Loops & Threads Soft Classic Acrylic
- "Taupe" color (1 skein, 354 yds)
- "Mustard" color (1 skein, 354 yds)
- "Mustard" color (1 skein, 354 yds)
- "Curry" color (1 skein, 354 yds)
- "Dark Taupe" color (1 skein, 354 yds)
- Other supplies
- Scissors
- Tapestry needle
Pattern / Instructions
See the pattern guide for descriptions of the terms/abbreviations used in the pattern.
Starting
- Make a slipknot
- 20 CH (or any even number)
- SK, SC
- SC into each CH accross the length
- 3 CH (counts as DC),
- 2 DC into 1st ST
- [2 SK, 3 DC into the same ST] until there are 2 ST + a CH left on the side you are working on
- 2 SK, 3 DC into CH, 2 CH then 3 DC into the same CH you did the last DCs into, 2 CH then 3 DC into the same CH you did the last DCs into
- [2 SK, 3 DC into the same ST] until the end of the row
- 2 CH, 3 DC into the same ST as the last set of 3 DC you had made, 2CH, SL into the top CH of the 3 that started the row
- Tie off, leaving a good bit of yarn to weave in, leave the tail for now (do not weave it in, as it can guide you to what side you want to work on next)
The Main Rows
- Turn your work over (the tail you left will now be on the bottom/back of the work)
- Tie on new yarn/color into any open space (between sets of 3 DC) by SL, skip this step if you are not changing colors
- 3 CH (counts as DC), 2 DC into same open space, CH
- [3 DC in next open space, CH] to corner
- In the corner space: [3 DC, 3 CH, 3 DC, CH]
- Repeat the previous two steps until you get back to where this round started. After your CH, SL into the top of the 3 CH you started the round with. If you are switching colors, cut and tie off this color, leaving a decently long tail to weave in. Start the main rows steps over with the next color or new round with existing color
- Note: For the exact blanket I did I went through each color in the order I wanted, then reversed. Once I got back to the starting color I changed to each color being two rounds and did the same pass through each color and back. Then did three rounds, four rounds, etc.
Finishing
The sky is the limit here. You could do a simple SC border, leave it how it is, add tassles, or look up how to do a decorative border (there are many kinds of decorative borders.
Weave in any ends you have still hanging about (I tend to do mine as I go, but I leave them for a round or two so that I can know more easily which side I am to be working on based on the current place in the pattern).